Showing posts with label OAK. Show all posts
Thursday, June 24, 2010
Back from eastern Europe!
Wednesday, March 4, 2009
How To: Antique brooch into pendant necklace
Welcome to a new BuenoStyle feature - random tutorial of the month!
This month, I will show you one method of turning an antique or vintage brooch into a pendant that you can then turn into a necklace.
If you raid your mother's or grandmother's jewelry box, no doubt it yield up some lovely vintage or even antique brooches. Another source is of course antique stores or, if you are lucky, thrift stores.
The piece I worked with for this project was found in an antique store in Revelstoke, BC. Yes, there is a place called Revelstoke in British Columbia. Gotta love this province!

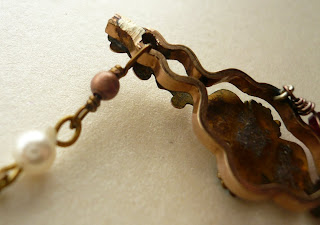
When I bought this Victorian era brooch, it was missing the back pin, but still had the hinge and hook assembly where the pin would have been attached to.

Your brooch you choose to work with will probably still have the whole pin section intact. Generally speaking, I prefer to get rid of the pin assembly all together when I make a pendant/necklace. Usually, I can use nipper pliers to cut off the pin assembly, but on this antique brooch the metal and solder was very hard. I had to turn to the SAW!

Do not be afraid of the jewelers saw! It looks evil and scary but it can be your best friend! I didn't even know you could easily saw through metal until I took a jewelry techniques class recently. You can find this style of jewelry saw at any jewelry specific supply places. I got this one at Habson's here in Vancouver. You'll need blades too; tell the staff what you need them for and they can walk you through which blades to buy and how to load the blades correctly.

The only thing you need to be aware of is the blade is SHARP and can quickly do some damage if you accidentally start sawing your skin instead metal. I was confident enough to saw the back off using my bare fingers - but you may want to use a ring clamp to hold your brooch. A ring clamp is an inexpensive easily adjustable clamp that will quickly become your "go-to" tool if you decide to do much sawing or filing of metal.

The thing to remember about sawing metal is that you need to let the blade do the work. This means do not white-knuckle it! Keep the handle of the saw lightly firm in your hands, and do not push the blade forward. Just keep it moving in a light but firm up and down motion. The blade's teeth only go in one direction, so it's the downward stroke that actually cuts. You may want to practice on a sample piece of metal until you've got the feel for a nice easy rhythm.

Once you have the back brooch assembly cut off, you'll need to turn to another inexpensive jewelers tool - the file. I picked up this tiny set at Habsons for about $12.00. It has small files in different shapes and roughness. You'll just want to file off any of the rough edges that the saw blade has left. The trick with filing is not to crank the file blade back and forth, the "teeth" only go in one direction, so just move the surface of the blade forward firmly and evenly over the surface.

Let me back up a bit here and point out that whatever brooch you choose to work with should have some obvious way of attaching wire or jump rings to it. With my brooch, there were small openings in the top and bottom that I could manoever some 24 guage wire into and create loops for hanging.
So the thing you want to look for in a brooch (at least with this method) are some type of open areas to use as an attachment point for wire or jump ring - there's two examples in the top row here. The top upper left brooch has open areas on the top and bottom - making it perfect for an asymmetrical necklace. The shiny gold bow brooch in the top row had several open areas on the back of the brooch, making it very easy to attach jump rings.
I decided to make my antique brooch into more of a pendant necklace partly because it was so delicate, and partly because it had already one loop in the centre bottom that would be perfect for hanging this vitnage red glass briolet from.

Ok - so you find your areas to wire wrap or put jump rings through and then you are ready to go. Use whatever design best fits your brooch. If it's a funky chunky 80's brooch, don't afraid to go with some bold chain and over the top faux pearls, etc.
If you want to learn how to make a wrapped loop - there is a great step by step tutorial here.
Here's the finished OAK necklace. If you'd like to see more of my One-of-A-Kind (OAK) creations, check out this link.

If you are interested in the idea of remaking vintage jewelry into something new and intriguing, check out this craftypod review of a book called Vintage Redux. I bought it recently and there's a lot of good ideas in there.
Happy creating!
This month, I will show you one method of turning an antique or vintage brooch into a pendant that you can then turn into a necklace.
If you raid your mother's or grandmother's jewelry box, no doubt it yield up some lovely vintage or even antique brooches. Another source is of course antique stores or, if you are lucky, thrift stores.
The piece I worked with for this project was found in an antique store in Revelstoke, BC. Yes, there is a place called Revelstoke in British Columbia. Gotta love this province!
When I bought this Victorian era brooch, it was missing the back pin, but still had the hinge and hook assembly where the pin would have been attached to.
Your brooch you choose to work with will probably still have the whole pin section intact. Generally speaking, I prefer to get rid of the pin assembly all together when I make a pendant/necklace. Usually, I can use nipper pliers to cut off the pin assembly, but on this antique brooch the metal and solder was very hard. I had to turn to the SAW!
Do not be afraid of the jewelers saw! It looks evil and scary but it can be your best friend! I didn't even know you could easily saw through metal until I took a jewelry techniques class recently. You can find this style of jewelry saw at any jewelry specific supply places. I got this one at Habson's here in Vancouver. You'll need blades too; tell the staff what you need them for and they can walk you through which blades to buy and how to load the blades correctly.
The only thing you need to be aware of is the blade is SHARP and can quickly do some damage if you accidentally start sawing your skin instead metal. I was confident enough to saw the back off using my bare fingers - but you may want to use a ring clamp to hold your brooch. A ring clamp is an inexpensive easily adjustable clamp that will quickly become your "go-to" tool if you decide to do much sawing or filing of metal.
The thing to remember about sawing metal is that you need to let the blade do the work. This means do not white-knuckle it! Keep the handle of the saw lightly firm in your hands, and do not push the blade forward. Just keep it moving in a light but firm up and down motion. The blade's teeth only go in one direction, so it's the downward stroke that actually cuts. You may want to practice on a sample piece of metal until you've got the feel for a nice easy rhythm.
Once you have the back brooch assembly cut off, you'll need to turn to another inexpensive jewelers tool - the file. I picked up this tiny set at Habsons for about $12.00. It has small files in different shapes and roughness. You'll just want to file off any of the rough edges that the saw blade has left. The trick with filing is not to crank the file blade back and forth, the "teeth" only go in one direction, so just move the surface of the blade forward firmly and evenly over the surface.
Let me back up a bit here and point out that whatever brooch you choose to work with should have some obvious way of attaching wire or jump rings to it. With my brooch, there were small openings in the top and bottom that I could manoever some 24 guage wire into and create loops for hanging.
So the thing you want to look for in a brooch (at least with this method) are some type of open areas to use as an attachment point for wire or jump ring - there's two examples in the top row here. The top upper left brooch has open areas on the top and bottom - making it perfect for an asymmetrical necklace. The shiny gold bow brooch in the top row had several open areas on the back of the brooch, making it very easy to attach jump rings.
I decided to make my antique brooch into more of a pendant necklace partly because it was so delicate, and partly because it had already one loop in the centre bottom that would be perfect for hanging this vitnage red glass briolet from.
Ok - so you find your areas to wire wrap or put jump rings through and then you are ready to go. Use whatever design best fits your brooch. If it's a funky chunky 80's brooch, don't afraid to go with some bold chain and over the top faux pearls, etc.
If you want to learn how to make a wrapped loop - there is a great step by step tutorial here.
Here's the finished OAK necklace. If you'd like to see more of my One-of-A-Kind (OAK) creations, check out this link.
If you are interested in the idea of remaking vintage jewelry into something new and intriguing, check out this craftypod review of a book called Vintage Redux. I bought it recently and there's a lot of good ideas in there.
Happy creating!
Thursday, February 5, 2009
Great Photos from Indie I Do!

Big thanks to Blue Olive Photography for taking these stunning shots of models wearing some BuenoStyle and OAK jewelry!
These gorgeous ladies (sorry - I don't know their names) were the announcer and one of the burlesque performers at Indie I Do. See this previous post for more on the show.
Monday, January 26, 2009
Good times at Indie I Do
It was fun to be a part of Vancouver's first "alternative" wedding show Indie I Do. Burlesque performers, tattooed photographers, corset wedding dresses all added to the fun, relaxed feel of the show. Once again, Lotus Events did a fine job of organizing and Heritage Hall looked great.
One of the burlesque performers and the announcer rocked some of my jewelry. I was promoting the OAK One-of-A-Kind line and the idea that you can have your grandmother's jewelry re-made into something more contemporary you would like to wear. (see post below).
And I tried out a new display for my booth area. I've had a folding screen kicking around for a while. I found it (free) outside a church on the west side and then added the fabric. For the show, I scanned a gold frame I have, added the images of the jewelry, printed them out and hand cut around the edges. Double sided tape and voila!
One of the burlesque performers and the announcer rocked some of my jewelry. I was promoting the OAK One-of-A-Kind line and the idea that you can have your grandmother's jewelry re-made into something more contemporary you would like to wear. (see post below).
And I tried out a new display for my booth area. I've had a folding screen kicking around for a while. I found it (free) outside a church on the west side and then added the fabric. For the show, I scanned a gold frame I have, added the images of the jewelry, printed them out and hand cut around the edges. Double sided tape and voila!
Sunday, January 18, 2009
Do you have your grandmother's old jewelry?
\You know, that brooch, those clip on earrings that nobody wears anymore? BuenoStyle can create a custom, OAK (One-of-A-Kind) re-creation for you using those old pieces sitting in your jewelry box. Check out this custom piece made for my friend's mother:

Paddy supplied the vintage rhinestone scarf clip and one of the gold/faux pearl chain. I decided to make it a 3 strand necklace with a vintage rose side clasp. Pretty, n'est pas?
And here's what I can do with some of those old clip-on earrings. Even if you don't have the pair:

Check out more OAK reworked vintage here.

Paddy supplied the vintage rhinestone scarf clip and one of the gold/faux pearl chain. I decided to make it a 3 strand necklace with a vintage rose side clasp. Pretty, n'est pas?
And here's what I can do with some of those old clip-on earrings. Even if you don't have the pair:

Check out more OAK reworked vintage here.
Subscribe to:
Posts (Atom)